In this article, we will cover how to create and use a calendar block package.
Providers and enterprise accounts are able to create calendar block packages to block off a certain date or time on a provider's schedule. The calendar block package allows for easy time blocking without affecting pre-existing online schedulers or provider availability settings.
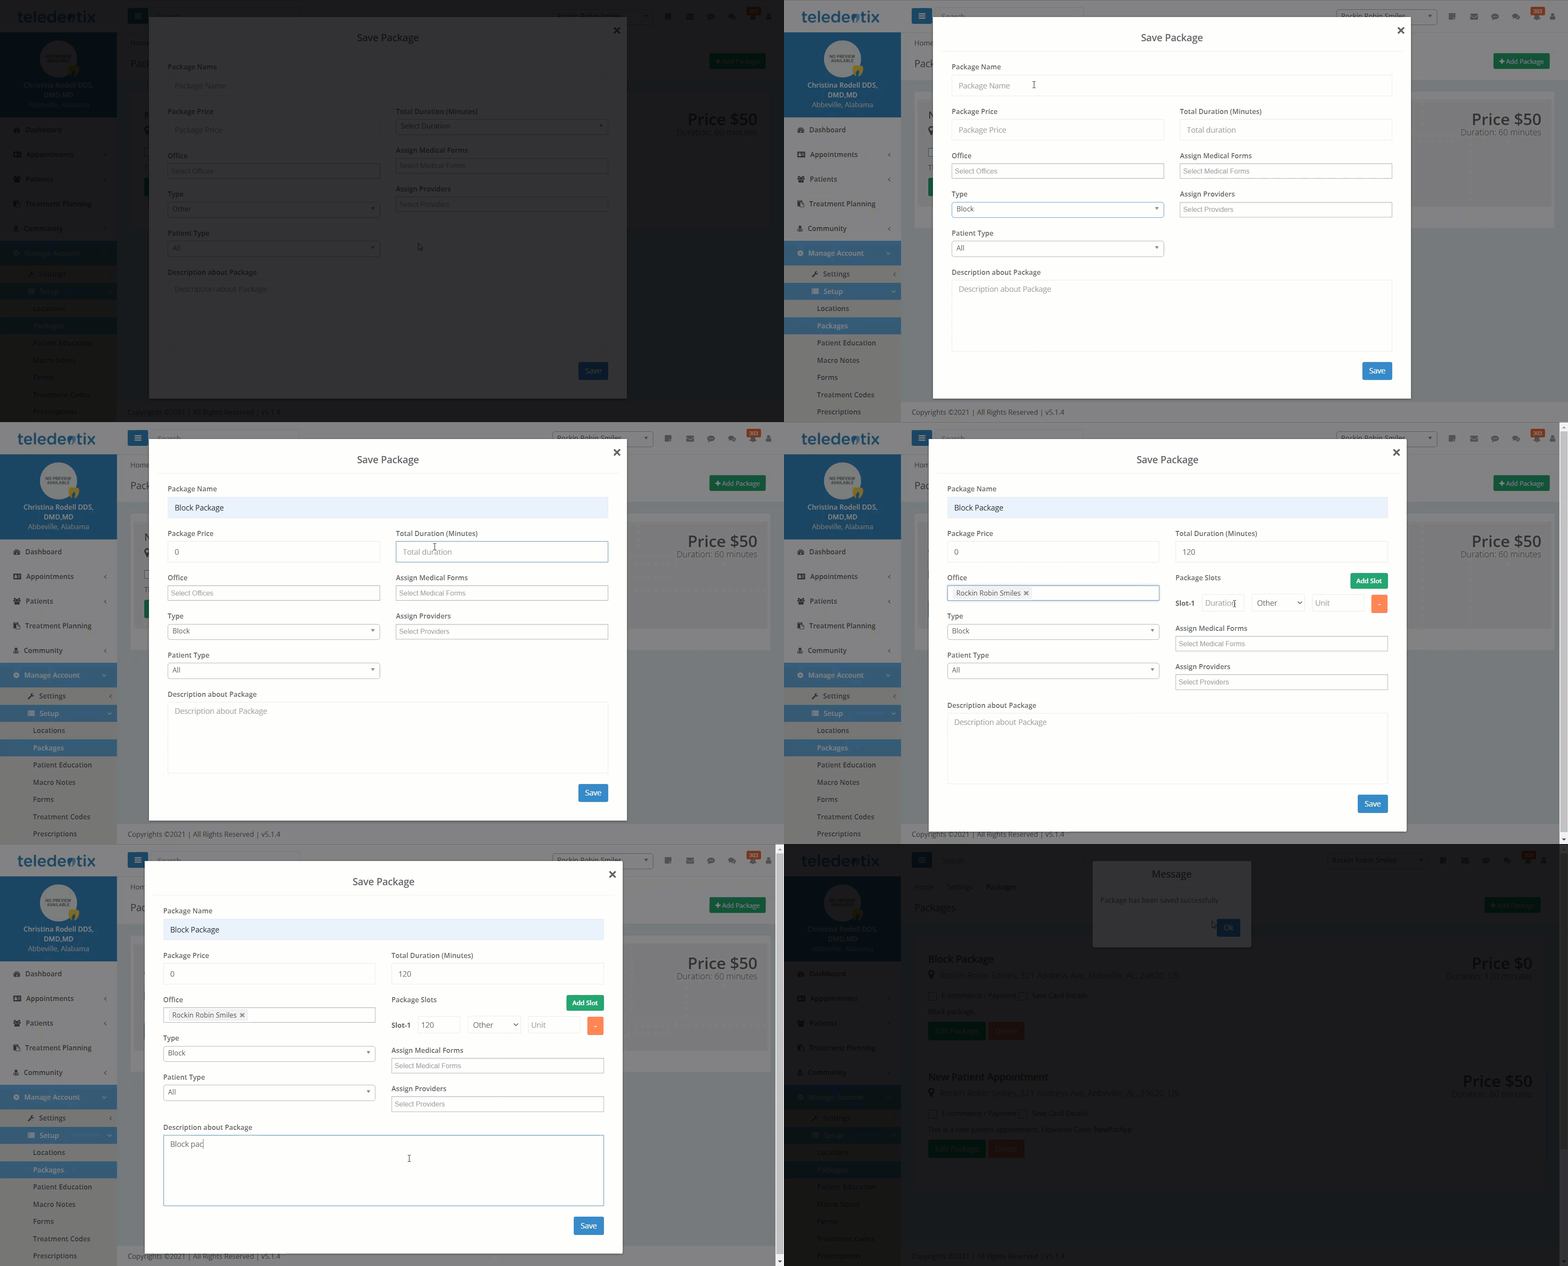
To create a calendar block package:
- On the Packages page, create a new or edit an existing package.
- In the Save Package pop-up, under "Type" select "Block"
- Under "Total Duration (Minutes)" type the length for the calendar block
- Fill in the remaining fields as with any other package type and save

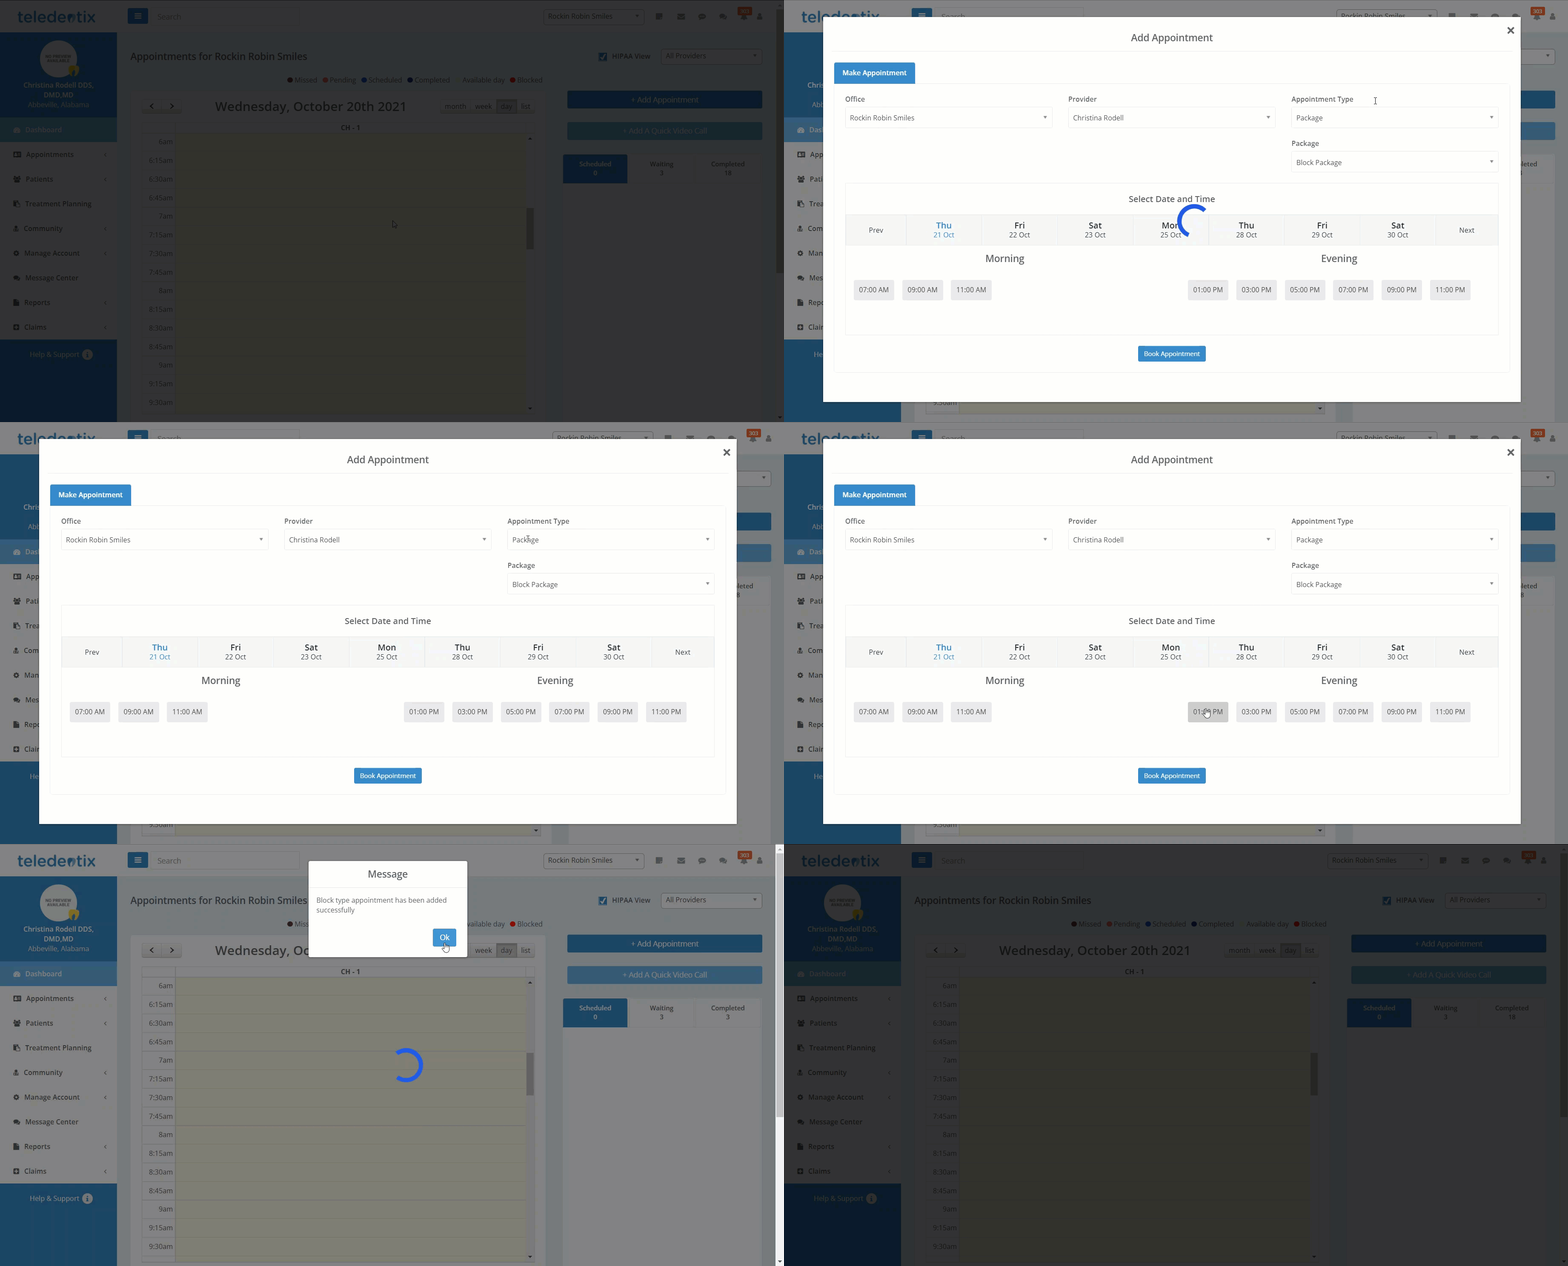
To use a calendar block package:
- On the Dashboard, click the "+Add Appointment" button
- On the "Add Appointment" pop-up, select the location and provider. Under Appointment Type, select Package and under Package, select your created calendar block appointment.
- Note: You do not need to select a patient for calendar block packages
- After selecting the calendar block package, select the time and click "Book Appointment" to add the calendar block package to the provider's schedule.

