In this article, you will learn where and how to manage and submit dental insurance claims.
Please note, the feature discussed in this article is only available within the Pro version of Teledentix
Before you are able to submit dental claims, you must first:
- Obtain a Dental Xchange Account to integrate with your Teledentix Account
In order to submit 'E-Claims' an account with Dental Xchange is necessary. Review their services here. A direct introduction will be made via our support representatives for a guided sign up.
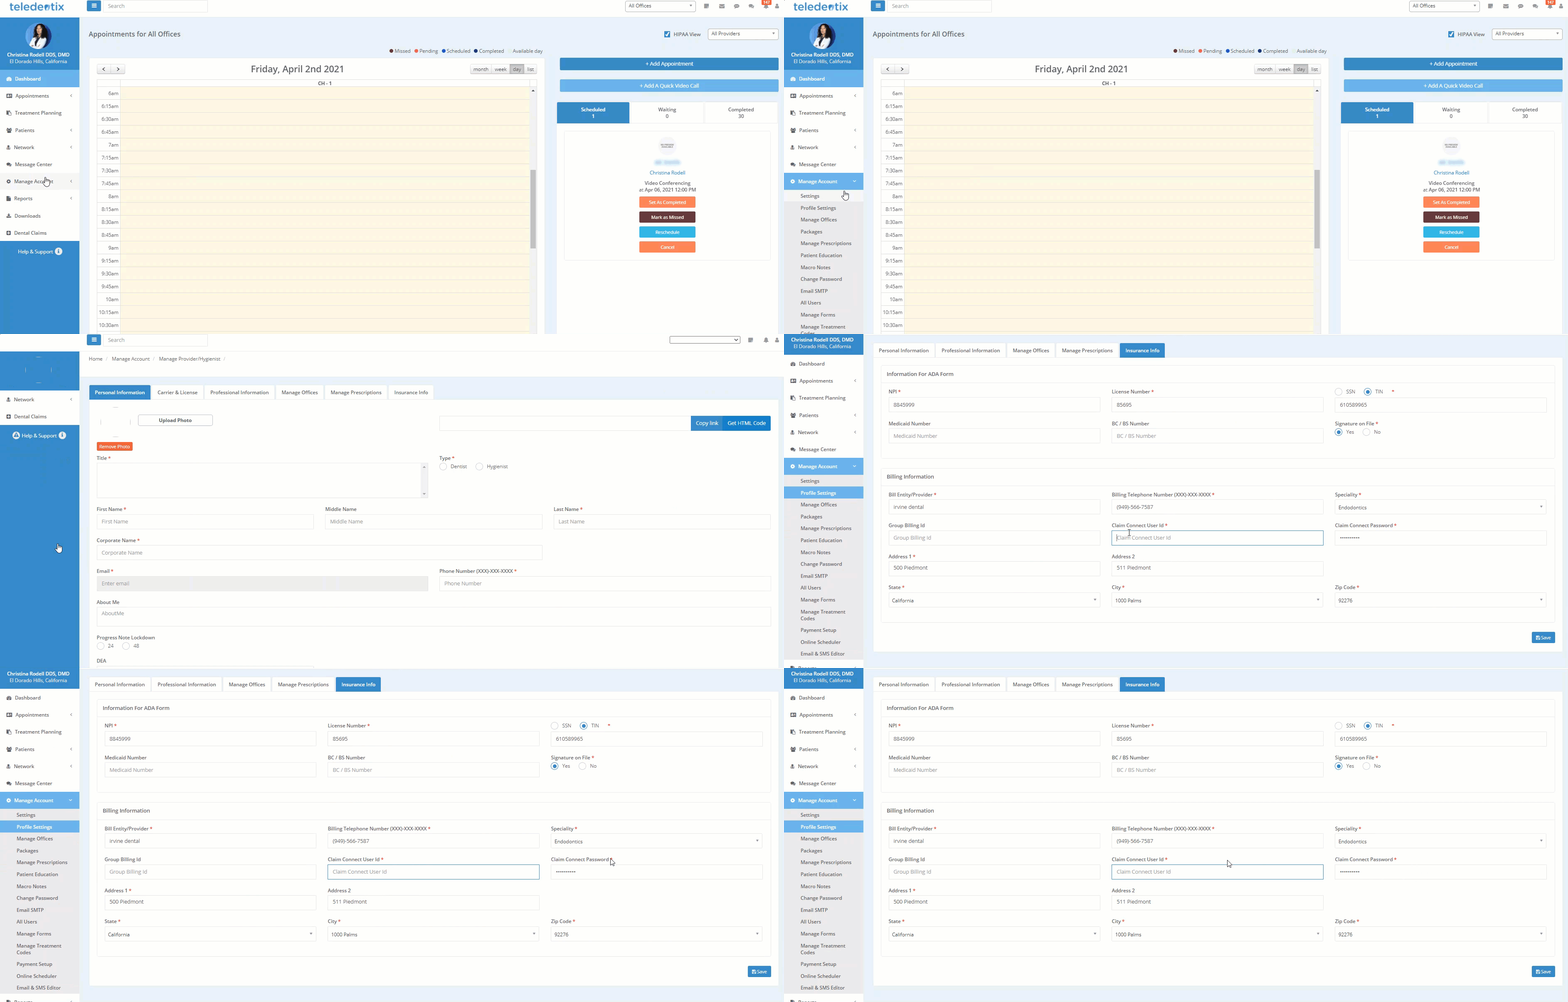
- Once an account with Dental Xchange is complete, you'll need to connect your Dental Xchange.
- Access your Teledentix Account
- Select "Manage Account"
- "Profile Settings"
- Select "Insurance Info" tab
- Locate the "Claim Connect User ID" and "Claim Connect Password", enter your Dental Xchange credentials and save.

Great! Next, make sure you have 1. Procedure codes in your account and 2. Patient insurance information.
- To add treatment codes and payment codes
- Add Treatment Codes
-
Enterprise Admin: Add Treatment Codes, Explosion Codes, and Payment Adjustment Codes
- Add patient insurance information
- Confirm the patient's insurance information and personal information match in Teledentix
To manage and submit dental claims:
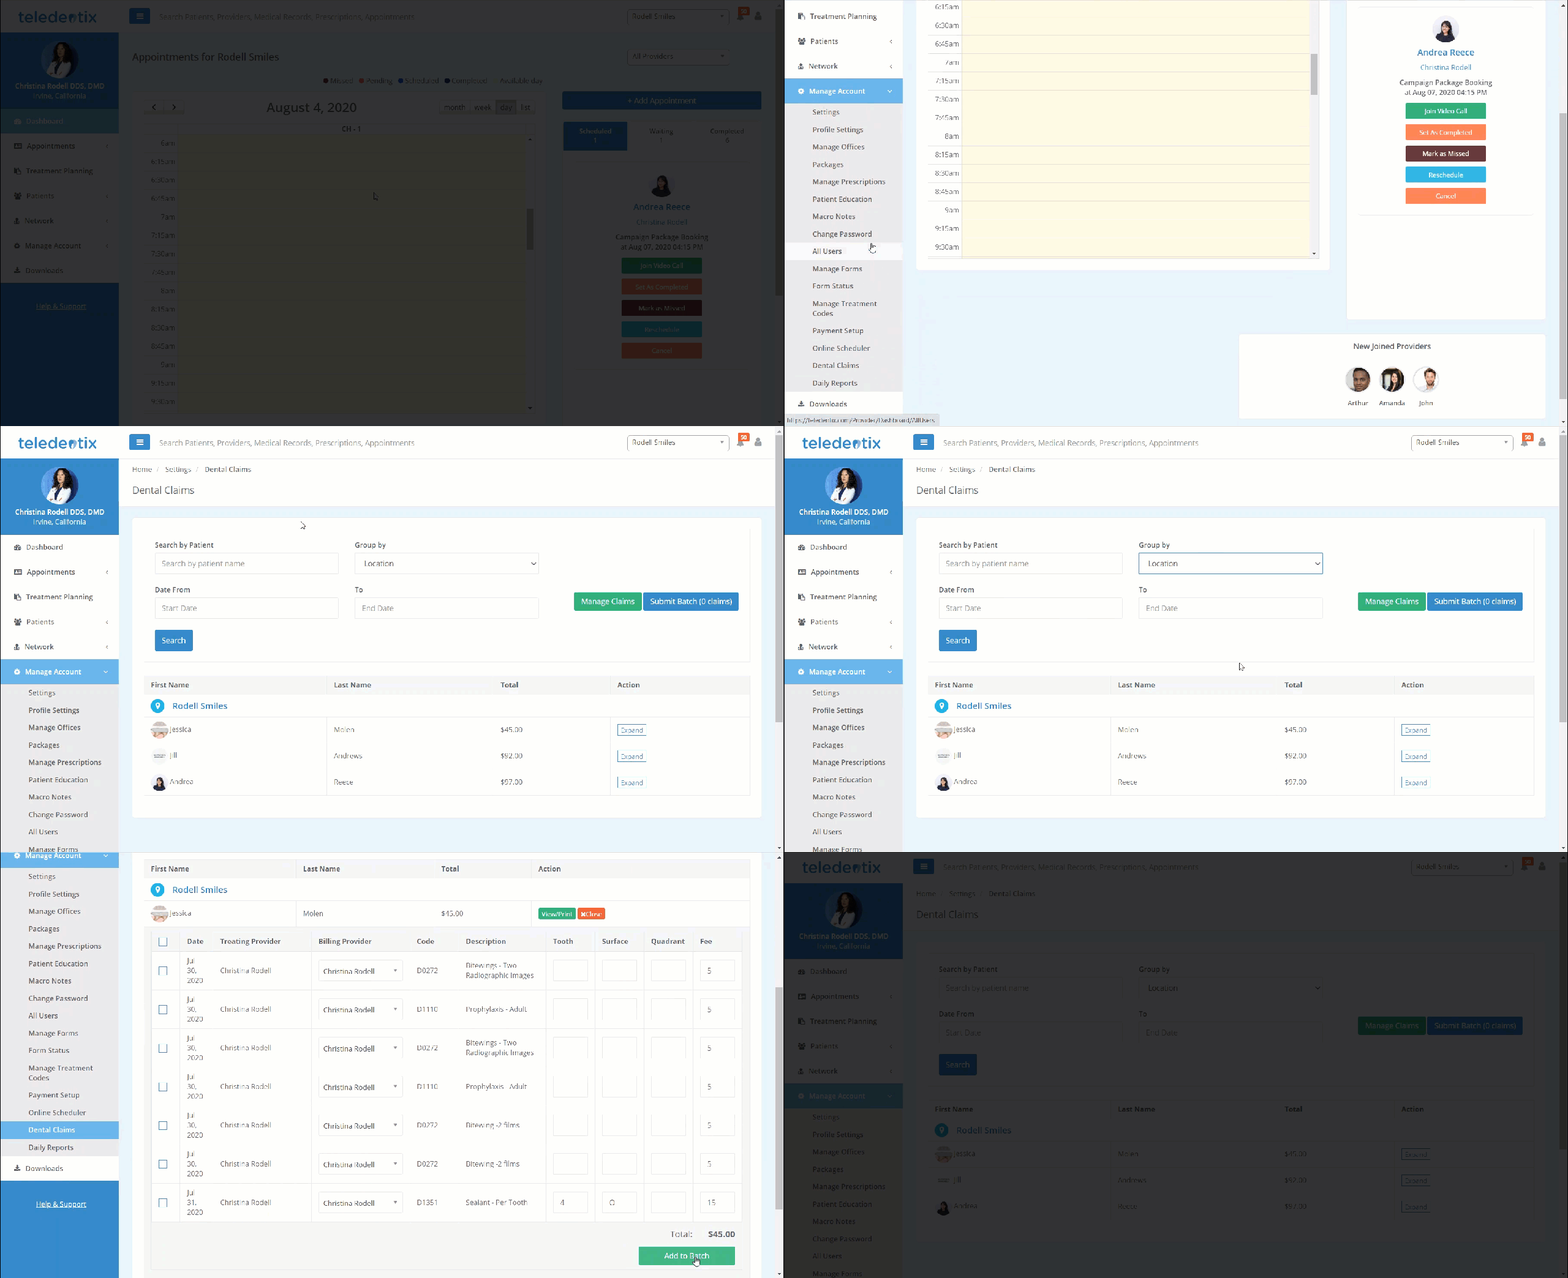
- Select "Manage Account" from the vertical list on the left hand side of the page.
- Select "Dental Claims" from the drop-down list.
- On the dental claims page, you are able to search for claims by patient and date.
- You are able to edit individual claims and create batches by clicking the "Expand" button that corresponds to your desired claim.
- You are able to toggle for different groupings of claims: location, treating provider, or insurance carrier.
- You are able to submit batches of claims by clicking the "Submit Batch" button.

